How to Replace a Kitchen Faucet in 10 Easy Steps
Replacing a kitchen faucet can feel like a daunting task, especially if you’ve never tackled plumbing projects before. You’re not alone—many people struggle with finding the right faucet and figuring out how to install it without making a mess.
But don’t worry, upgrading your kitchen faucet is easier than you think, and it can make a huge difference in both style and functionality.
To replace your kitchen faucet, first gather your tools and turn off the water supply. Remove the old faucet carefully, then clean the sink area thoroughly.
Install the new faucet base with its gasket, secure mounting nuts evenly, and connect the supply lines using plumber’s tape to prevent leaks.
Turn the water back on, check for leaks, and adjust the handles for smooth operation.
Keep your faucet maintained to ensure durability, and investigate the full process for a flawless upgrade.
Key Takeaways
- Turn off the water supply and drain any leftover water by opening the faucet fully before removal.
- Disconnect the supply lines and remove the mounting nuts to carefully detach the old faucet.
- Clean the sink surface thoroughly to get rid of old putty, caulk, and debris before installing the new faucet.
- Position the new faucet with the gasket, secure the mounting nuts evenly, and connect the supply lines using plumber’s tape.
- Turn the water back on slowly, check for leaks, adjust the handle tension as needed, and perform regular maintenance for the best function.
Gather Your Tools and Materials

Before you begin, make sure you have all the necessary tools and materials on hand to avoid interruptions. You’ll need an adjustable wrench, basin wrench, plumber’s tape, a bucket, and a screwdriver. Double-check that your new faucet is compatible with your sink’s configuration to ensure smooth installation. Material compatibility is crucial, as mixing metals like brass and stainless steel can cause corrosion over time.
Pay close attention to tool safety by inspecting your tools before use. Make sure the wrench grips are secure and your screwdriver handles aren’t cracked. Wearing gloves can protect your hands from sharp edges and improve your grip. Organize your workspace so you can access everything easily without fumbling, reducing the risk of accidents.
Having all tools and materials ready and ensuring their compatibility makes the faucet replacement process faster and safer. Taking these steps upfront prevents delays and protects you from injury during the project.
Turn Off Your Kitchen Water Supply
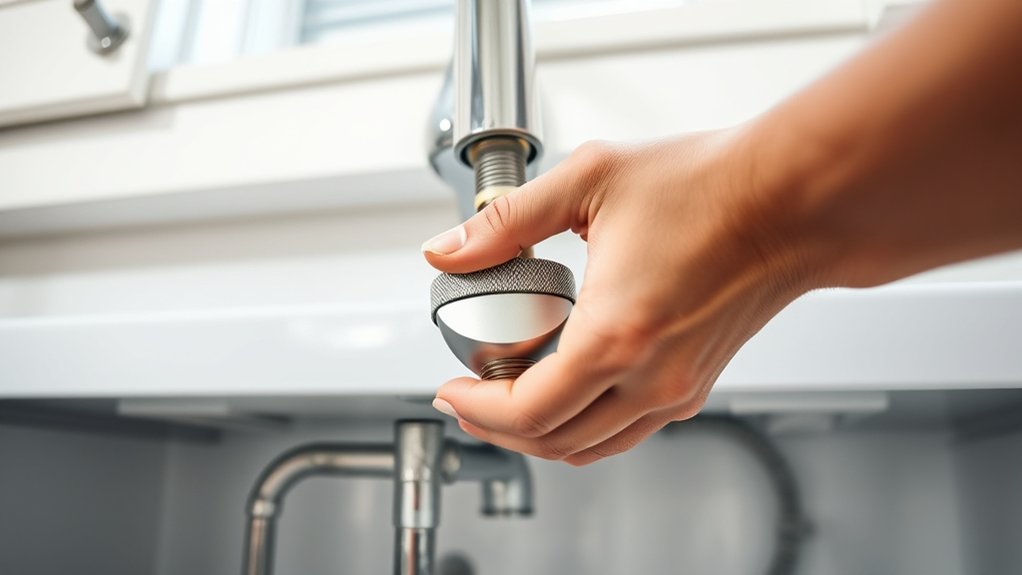
First, locate the shutoff valves under your sink. Give them a turn clockwise to stop the water flow. Once that’s done, go ahead and turn on the faucet to make sure the water is completely off. Finally, open the faucet fully to let any remaining water drain out before you begin the replacement.
Locate Water Shutoff Valves
Since water can cause significant damage if it flows while you’re working, you’ll need to locate and turn off the water shutoff valves under your kitchen sink. These valves control the water supply to your faucet, allowing you to work safely without flooding your kitchen.
Usually, you’ll find two valves, one for hot water and one for cold, attached to the pipes beneath the sink. Turning them clockwise will shut off the flow. This step supports water conservation by preventing leaks or accidental water waste during the replacement process.
Knowing your faucet design helps, as some modern faucets have integrated shutoff valves or different plumbing setups. Identifying these valves early guarantees a smooth changeover to the next steps without unexpected water issues.
Verify Water Supply Is Off
Although you’ve turned the shutoff valves under your sink, you’ll want to double-check that the water supply is completely off before proceeding. Turn on the faucet to confirm no water flows, making sure the water pressure has fully stopped. This step prevents accidental leaks or water damage while you work.
Keep in mind that some older shutoff valves might not completely stop water flow, so verifying is essential. Also, this is a good time to think about faucet compatibility. If your new faucet requires different water pressure or connector types, you might need to adjust your supply lines accordingly.
Taking these precautions now saves you from surprises later and ensures a smooth faucet replacement process.
Drain Remaining Water
Once you confirm the water supply is fully off, the next step is to drain any remaining water from your kitchen faucet and supply lines. Open the faucet handles to let all the water flow out completely. This water drainage prevents leaks when you disconnect the old faucet.
Don’t forget to check under the sink for any residual water in the supply tubes. Use a small container or towel to catch drips. Performing this step also gives you a chance for a quick plumbing inspection.
Look for any signs of corrosion, cracks, or mineral buildup that might need attention before installing the new faucet. Proper water drainage and thorough plumbing inspection will make the replacement process smoother and reduce the risk of unexpected issues.
Remove the Old Kitchen Faucet Carefully

Before you start removing the old kitchen faucet, make sure to turn off the water supply and clear the area under the sink. This prevents any unexpected leaks and gives you enough workspace.
Next, disconnect the water supply lines carefully using an adjustable wrench. Pay attention to the faucet material. Brass or stainless steel fittings may require a bit more care to avoid damage.
Keep track of any mounting nuts or brackets securing the faucet to the sink. Use a basin wrench if space is tight.
As you remove the faucet, note the brand compatibility of your old fixture. This helps when selecting a new faucet that fits existing holes or connections.
Handle all parts gently to avoid scratching your sink or damaging plumbing components. Once free, lift the faucet out slowly, ensuring no debris falls into the sink drain.
Removing the old faucet carefully sets the stage for a smooth installation of your new fixture.
Prepare and Clean the Sink Area for Installation
Since you’ve removed the old faucet, you need to thoroughly clean and prepare the sink area to guarantee a secure and leak-free installation of your new fixture. Start by using appropriate cleaning techniques based on your sink materials. For stainless steel sinks, a mild detergent and warm water work best to remove grime without causing scratches.
For porcelain or ceramic sinks, avoid abrasive cleaners. Instead, use a non-abrasive sponge and a gentle cleaner to protect the surface.
Pay close attention to the mounting holes and surrounding areas, removing any old plumber’s putty, caulk, or mineral deposits. Use a soft brush or cloth to reach tight spaces and ensure the sink surface is dry and smooth. Proper cleaning prevents leaks and ensures a tight seal when you install the new faucet.
Taking this step seriously helps your new faucet last longer and function properly without unexpected drips.
Install the New Faucet Base and Gasket Properly
First, make sure to line up the faucet base properly over the sink holes so it fits just right. Then, place the gasket firmly underneath the base—that way, you’ll help stop any leaks from happening. After that, go ahead and tighten the mounting nuts evenly to keep everything steady and sealed tight. Easy, right?
Align Faucet Base Correctly
How do you guarantee the faucet base sits perfectly during installation? Focus on precise faucet alignment from the start. Position the base over the sink holes carefully, ensuring it’s centered and straight.
Use your mounting technique to hold it steady. Tighten mounting nuts gradually and evenly to avoid shifting. Avoid overtightening, which can misalign the base or damage components.
Check the faucet base from multiple angles as you secure it, confirming it hasn’t moved. This careful approach ensures the faucet operates smoothly and looks professional.
Position Gasket Securely
Where exactly should you place the gasket to guarantee a tight seal? Position the gasket directly under the faucet base, aligning it perfectly with the sink’s mounting holes. Proper gasket placement is essential for preventing leaks and ensuring water doesn’t seep beneath the faucet.
Use reliable sealing techniques by pressing the gasket firmly onto the sink surface, making sure it lies flat without any wrinkles or gaps. If your faucet didn’t include a gasket, apply a thin bead of plumber’s putty or silicone sealant around the base’s edge before setting it down. This creates a watertight barrier.
Take your time positioning the gasket securely. This step prevents future water damage and keeps your new faucet stable and leak-free.
Tighten Mounting Nuts Evenly
Once the gasket is properly positioned, you’ll want to tighten the mounting nuts evenly to secure the faucet base firmly to the sink. The mounting nut importance can’t be overstated. They hold the faucet steady, preventing leaks and movement.
Use your hand to start threading each nut, then switch to a basin wrench for proper tightening. Tighten each nut a little at a time, alternating between them to apply even pressure. This balanced approach ensures the gasket seals correctly and the faucet base sits flush.
Avoid overtightening, which can damage the sink or strip the nuts. By focusing on proper tightening, you guarantee a stable, leak-free installation that lasts. Remember, evenly tightened mounting nuts are key to a professional, durable faucet replacement.
Connect the Kitchen Faucet Water Supply Lines
Before you connect the water supply lines to your new kitchen faucet, make sure the shut-off valves under the sink are turned off to prevent any leaks. Next, align the flexible water supply lines with the faucet’s inlets, ensuring a secure fit that supports both water conservation and faucet ergonomics. Proper connection prevents drips and promotes efficient water flow.
Turn off shut-off valves and securely align supply lines to ensure leak-free, efficient faucet performance.
Follow these steps for a smooth connection:
- Use plumber’s tape on threaded connections to prevent leaks.
- Hand-tighten nuts first, then snug with a wrench, but don’t overtighten.
- Connect hot and cold lines to their corresponding valves.
- Check hose length to avoid kinks that can reduce water pressure.
- Inspect all connections for leaks once the water is turned back on.
Tighten All Kitchen Faucet Mounting Nuts Securely
Now that the supply lines are connected, go ahead and find all the mounting nuts under your sink. Grab the right tools and tighten each nut securely. Be sure to apply even pressure around the faucet base as you go. This helps prevent leaks and keeps your faucet nice and stable.
Identify Mounting Nut Locations
Although mounting nuts are small, they play a crucial role in securing your kitchen faucet firmly to the sink. Proper location identification of these mounting nuts ensures a stable faucet installation and prevents leaks or wobbling.
When you’re ready to replace your faucet, follow these steps to find each mounting nut:
Look underneath the sink directly below the faucet base. Identify the metal or plastic nuts holding the faucet in place. Check around the faucet’s supply lines for additional mounting points.
Use a flashlight to spot hard-to-see nuts in tight spaces. Confirm all mounting nuts are accounted for before loosening or tightening.
Accurate mounting nut location identification simplifies the replacement process and guarantees your faucet stays secure after installation.
Use Proper Tools
After locating all the mounting nuts beneath your sink, the next step is to tighten them securely using the right tools. Choose a wrench or basin wrench that fits the nuts perfectly to avoid slipping or damaging them.
Always consider tool safety. Wear gloves and make sure your grip is firm to prevent accidents. Also, check material compatibility. Some faucets have brass or plastic nuts that require a gentler touch than steel nuts.
Using an adjustable wrench on plastic nuts, for instance, can cause cracks, so opt for tools designed for those materials. Tighten each nut firmly without overdoing it, as overtightening can strip threads or crack the mounting surface. Using proper tools ensures a secure fit and prolongs the faucet’s lifespan.
Check Tightness Evenly
While tightening the mounting nuts, make sure you apply even pressure to each one to prevent misalignment or leaks. Uneven tightening can cause gaps or stress, which compromises the faucet’s stability and can lead to water damage.
Use proper tightening techniques by alternating between nuts gradually rather than fully tightening one at a time. This way, the faucet seats correctly and helps prevent leaks.
Keep these tightening techniques in mind:
- Tighten nuts incrementally in a crisscross pattern
- Use a basin wrench for hard-to-reach nuts
- Avoid overtightening to prevent damaging threads
- Check the faucet’s alignment frequently during tightening
- Test for leaks after securing all nuts
Turn Water Back On and Check for Leaks
How do you know if your new faucet installation was successful? First, turn the water supply back on slowly to avoid sudden pressure surges. Once the water flows, check the water pressure at the faucet to ensure it’s strong and consistent. If the pressure feels weak, double-check the connections under the sink.
Next, perform a thorough leak detection by inspecting all joints and connections closely. Use a dry cloth or paper towel to wipe around the base and underneath the sink, then watch for any moisture forming. Even small drips can indicate a problem. Don’t forget to check both the hot and cold water lines separately.
If you spot any leaks, tighten the fittings carefully but avoid over-tightening, which can cause damage. Fixing leaks promptly guarantees your new faucet works efficiently and prevents water damage. Once you’re confident there are no leaks and the water pressure is good, you’re ready to move to the next step.
Adjust Handle Tension and Test Water Flow
Once you’ve confirmed there are no leaks and water pressure is strong, it’s time to adjust the handle tension to guarantee smooth operation. Proper handle adjustment ensures your faucet feels responsive without being too loose or stiff.
Start by locating the tension screw beneath or behind the handle. Turn it clockwise to tighten or counterclockwise to loosen until the handle moves comfortably.
Next, perform water testing to confirm the flow meets your expectations. Turn the handle on and off several times, checking for smooth progressions between hot, cold, and mixed water.
Make sure the water pressure remains consistent and the handle doesn’t stick.
Here’s a quick checklist for this step:
- Locate and adjust the handle tension screw
- Turn handle to test smoothness and resistance
- Run both hot and cold water separately
- Check water pressure consistency during operation
- Confirm no unusual noises or drips occur during water testing
This assures your new faucet operates perfectly before finishing up.
Keep Your Kitchen Faucet Working Smoothly With Routine Maintenance
To keep your kitchen faucet working smoothly, you need to perform routine maintenance regularly. Start by following simple cleaning tips to prevent buildup and corrosion. Wipe down your faucet with a mild soap and water solution weekly, focusing on areas around the handles and spout where grime tends to collect.
Routine maintenance keeps your kitchen faucet smooth—wipe weekly with mild soap and water to prevent buildup.
Avoid harsh chemicals that could damage the finish, especially if you have specialty faucet styles like brushed nickel or oil-rubbed bronze.
Every few months, remove and soak aerators in vinegar to clear mineral deposits that restrict water flow. Don’t forget to check for leaks in connections and tighten any loose parts.
If your faucet has a pull-out sprayer, make sure the hose retracts smoothly by cleaning the guide and checking for kinks.
Frequently Asked Questions
What Type of Kitchen Faucet Is Best for Hard Water Areas?
You’ll want a kitchen faucet designed specifically for hard water areas, featuring anti-corrosion coatings to resist mineral buildup and rust. Faucets with built-in water filtration systems are great because they reduce contaminants and protect your plumbing.
Choosing one with durable materials like brass or stainless steel also helps. This way, you’ll extend your faucet’s lifespan and keep your water cleaner without frequent replacements or repairs.
Can I Install a Kitchen Faucet Without a Professional Plumber?
You can definitely tackle installing a kitchen faucet without a professional plumber. It’s like assembling a puzzle with the right pieces and patience. With basic DIY plumbing skills and a little faucet maintenance know-how, you’ll breeze through the process.
Just turn off the water, follow clear instructions, and use proper tools. Taking charge not only saves money but also gives you confidence in handling future fixes around your home.
How Do I Choose the Right Faucet Height and Style?
You should pick a faucet height that fits your sink and tasks. Taller faucets work well if you wash large pots, but make sure your water pressure can handle it without splashing.
For style, match your kitchen’s design and your daily needs. During faucet installation, consider both aesthetics and functionality to avoid issues.
Checking water pressure helps guarantee your new faucet performs efficiently without leaks or poor flow.
What Materials Are Most Durable for Kitchen Faucets?
You’ll want to choose kitchen faucets made from brass, stainless steel, or bronze since they’re the most durable. Brass resists corrosion, while stainless steel handles wear and tear well. Bronze adds a stylish, long-lasting touch.
When installing, make sure you have the right installation tools to avoid damage. For cleaning tips, use mild soap and avoid abrasive cleaners to keep your faucet looking great and functioning smoothly for years.
Are There Eco-Friendly Kitchen Faucet Options Available?
You’ll find eco-friendly kitchen faucet options that are true gems for your home and planet. Crafted from eco-friendly materials like recycled brass or stainless steel, these faucets don’t just shine, they conserve.
Many models boast water-saving features, like aerators and flow restrictors, cutting your water use without sacrificing performance. Choosing one helps you dance lightly on the Earth while enjoying modern functionality and style in your kitchen.
Conclusion
Replacing your kitchen faucet yourself proves that tackling home repairs isn’t as intimidating as it seems. By following these steps, you not only save money but also gain confidence in your DIY skills.
Remember, the theory that plumbing is too complex can be debunked. Anyone can learn and succeed with patience and care.
Keep your faucet maintained, and you’ll enjoy smooth operation for years. Replacing a kitchen faucet is a simple task that leads to lasting empowerment.