How to Install a Kitchen Sink in 10 Simple Steps
Installing a kitchen sink can feel overwhelming, especially if you’ve never done it before. You’re not alone—many people struggle with finding the right guidance and tools to make the process smooth and hassle-free.
Whether you’re upgrading your old sink or tackling a new installation, having clear, simple steps can make all the difference.
First, gather your tools and turn off the water supply. Remove the old sink, then measure and prepare your countertop cutout for the new sink.
Position and secure the sink, install the faucet and accessories, and connect the water supply lines.
Apply sealant around the edges to prevent leaks, then test for leaks and water flow.
Finally, clean up your workspace for a polished finish. Keep going to see how to master each step with confidence and ease.
Key Takeaways
- Turn off the water supply and remove the old sink by disconnecting the water and drain lines.
- Measure and mark the countertop, then cut the opening for the new sink accurately.
- Position the new sink, apply silicone sealant around the edges, and secure it with mounting clips.
- Connect drain pipes, garbage disposal, faucet, and water supply lines, making sure all fittings are tight and leak-free.
- Seal the edges, let the sealant dry fully, then test the water flow and check for leaks before doing the final cleanup.
Get Your Tools and Materials Ready
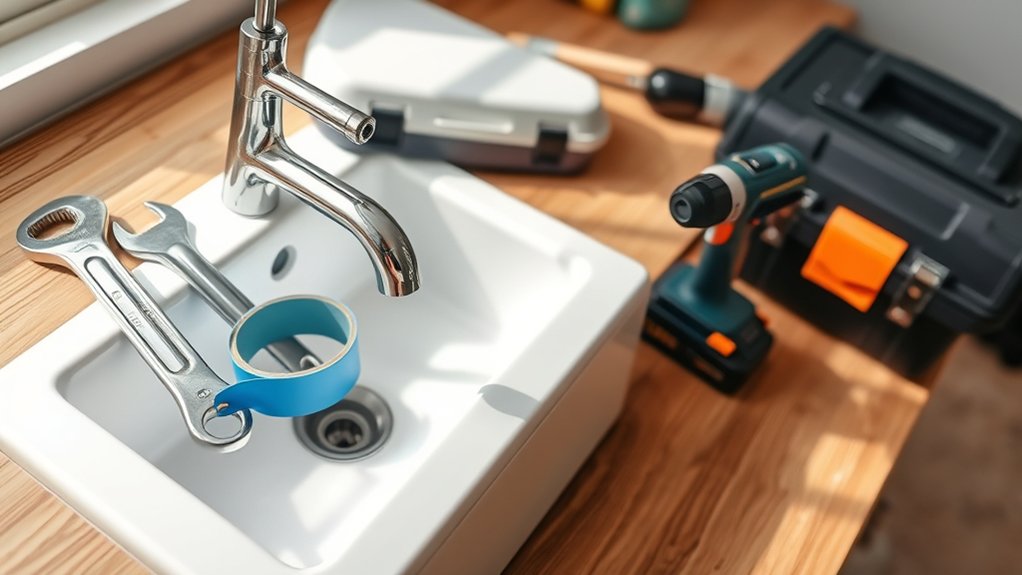
Before you begin installing your kitchen sink, make sure you have all the necessary tools and materials on hand. Gathering everything upfront saves you time and frustration. You’ll need a wrench, plumber’s putty, a screwdriver, a bucket, and a tape measure. Don’t forget the sink itself and any new fixtures or hoses required.
Pay attention to your kitchen décor when selecting your sink to guarantee it complements your style. A stainless steel sink fits a modern look, while porcelain suits more traditional designs. Also, check local plumbing codes before purchasing materials. These rules ensure your installation meets safety standards and prevents future issues.
Turn Off Water and Disconnect Your Old Kitchen Sink

Once you have all your tools and materials ready, the next step is to shut off the water supply to your kitchen sink. Locate the shutoff valves under the sink and turn them clockwise to stop the water flow. If there aren’t individual valves, turn off the main water supply for your home.
Begin by turning off the water supply under your kitchen sink to prevent leaks during installation.
Next, open the faucet to relieve any remaining water pressure in the pipes. This prevents water from spraying when you disconnect the pipe fittings.
Now, place a bucket or towel underneath to catch any residual water. Use an adjustable wrench to carefully loosen the pipe fittings connecting the water supply lines to the faucet. Then, disconnect the drain pipes by loosening the slip nuts.
Be cautious as some water may still be inside the pipes. Removing the old sink becomes easier once all connections are detached. This step guarantees a clean start without leaks, making your installation process smoother and safer.
Measure and Prepare the Countertop Cutout for Your Kitchen Sink

As you prepare to install your new kitchen sink, accurately measuring and marking the countertop cutout is essential to guarantee a perfect fit. Start by reviewing the countertop dimensions and the sink material options, as different materials may require specific clearances.
Use the sink’s template or measure its dimensions carefully, adding space for the mounting clips and sealant. Mark the cutout on your countertop using a pencil. Double-check measurements to avoid costly errors.
Remember to account for the sink’s lip and any overhang.
Here’s a quick guide to help you with measurements:
| Sink Type | Countertop Dimensions Needed | Recommended Cutout Size |
|---|---|---|
| Stainless Steel | Standard 25” x 22” | 24” x 20” |
| Composite Granite | Slightly larger for fit | 24.5” x 20.5” |
| Porcelain | Fragile, precise cut required | 24” x 20” |
Once marked, use the appropriate tools to carefully cut the countertop for your new sink.
Position and Secure Your New Kitchen Sink in the Countertop
Although cutting the countertop accurately is essential, positioning and securing your new kitchen sink properly is what guarantees a stable, leak-free installation. Start by placing the sink carefully into the cutout, ensuring that it sits evenly without gaps or tilting.
Accurate cutting matters, but proper sink positioning and secure installation ensure stability and prevent leaks.
Check the sink positioning by confirming it aligns with the countertop edges and any pre-drilled holes. Next, inspect the countertop support beneath the sink area; it must be solid and level to handle the sink’s weight and daily use. If necessary, add extra bracing or shims to reinforce this support.
Once positioned correctly, apply a bead of silicone sealant around the sink’s rim where it meets the countertop. Press the sink firmly into place to create a tight seal and wipe away excess sealant.
Finally, secure the sink with mounting clips or brackets provided by the manufacturer, tightening them evenly to avoid warping. Proper sink positioning with adequate countertop support ensures durability and prevents leaks.
Install the Faucet and Accessories on the New Sink
After securing your sink firmly in place, you can move on to installing the faucet and any accessories. Start by aligning the faucet with the designated holes, then tighten the mounting nuts from underneath. Don’t forget to attach the water supply lines securely to avoid leaks.
If your sink includes accessories like a soap dispenser or sprayer, install them likewise, ensuring everything fits snugly.
Keep these tips in mind for a smooth installation and future care:
- Use plumber’s putty to seal connections, preventing water damage.
- Regularly perform faucet maintenance to extend its lifespan and avoid drips.
- Incorporate sink cleaning into your routine to maintain a spotless and hygienic workspace.
Connect the Drain Assembly and Install Garbage Disposal (If Needed)
When you’re ready to connect the drain assembly, start by securing the drain flange to the sink’s drain hole with plumber’s putty to guarantee a watertight seal. Next, assemble the drain pipes according to the manufacturer’s instructions and tighten all slip nuts by hand to avoid leaks.
If you’re installing a garbage disposal, mount it to the sink’s drain flange before connecting the drain assembly. Make sure to align the disposal properly and secure it with the mounting ring.
Here’s a quick overview of key steps:
| Step | Description |
|---|---|
| Apply plumber’s putty | Seal drain flange to sink |
| Mount garbage disposal | Attach to drain flange if needed |
| Assemble drain pipes | Connect drain assembly parts |
| Tighten slip nuts | Hand-tighten to prevent leaks |
| Test for leaks | Run water and check connections |
Following these steps guarantees your drain assembly and garbage disposal will function smoothly without leaks.
Attach Water Supply Lines to the Faucet
Now it’s time to attach the water supply lines to your faucet. First, make sure you pick the right supply lines that fit both your faucet and your plumbing connections. Once you have the right ones, go ahead and connect the lines securely. This will help prevent leaks and make sure you get a steady water flow.
Choosing Proper Supply Lines
Selecting the right supply lines is essential for a secure and leak-free connection between your faucet and water valves. You’ll want to evaluate supply line types carefully. Braided stainless steel lines offer durability, while flexible plastic ones are easier to install.
Don’t forget pipe insulation, especially if your kitchen is prone to temperature fluctuations. It helps prevent pipes from freezing or sweating.
Keep these in mind when choosing supply lines:
- Durability matters. Choose lines that resist corrosion and wear.
- Flexibility saves time and effort during installation.
- Proper pipe insulation protects your home from water damage and energy loss.
Connecting Lines Securely
Before attaching the water supply lines to your faucet, make sure both the faucet and valves are clean and free of debris. This helps guarantee a tight seal. Connect each supply line to the corresponding valve, hot to hot, cold to cold.
Tighten the connectors by hand first, then use a wrench for a snug fit. Be careful not to overtighten, as this can cause damage. Secure the lines using mounting brackets to keep them stable and reduce strain.
Finally, wrap pipe insulation around exposed areas to prevent condensation and protect pipes from temperature changes.
| Step | Action |
|---|---|
| 1 | Clean faucet and valves |
| 2 | Connect supply lines |
| 3 | Hand-tighten, then wrench-tighten |
| 4 | Secure lines with mounting brackets |
| 5 | Apply pipe insulation |
Seal the Sink Edges to Keep Water Out
To stop water from leaking under your sink, you’ll want to pick the right sealant for the job. Just apply it evenly around the edges of the sink to make a solid barrier. Then, be sure to let it dry completely before you use the sink again—that way, you’ll get a proper seal.
Choose The Right Sealant
How do you guarantee your kitchen sink stays watertight and free from leaks? Choosing the right sealant is key. Different sealant types offer varying levels of durability and flexibility, so pick one that suits your sink material and usage.
Silicone-based sealants are popular for their waterproof and mold-resistant properties, while plumber’s putty works well for sealing drains.
Consider these points when selecting your sealant: compatibility with your sink and countertop materials, resistance to water, heat, and mold, and ease of cleanup and application.
Understanding proper application techniques helps you avoid gaps and weak spots, ensuring a perfect seal. By selecting the right sealant and preparing for its application, you set the foundation for a leak-free, long-lasting kitchen sink installation.
Apply Sealant Evenly
Choosing the right sealant sets you up for success, but applying it evenly along the sink edges truly keeps water from seeping through. Before you start, familiarize yourself with basic caulking techniques to guarantee a smooth, consistent bead.
Cut the nozzle at a 45-degree angle for better control, then apply steady pressure on the caulking gun as you move around the sink perimeter. Different sealant types like silicone or latex have varying consistencies. Choose one compatible with your sink material and countertop.
After applying, use a damp finger or a caulk smoothing tool to even out the bead, pressing it firmly into gaps. This precise application prevents leaks and prolongs the sink’s durability, assuring a watertight seal that stands up to daily kitchen use.
Allow Proper Drying Time
Although applying sealant evenly is essential, you’ll need to let it dry completely before using the sink to guarantee a strong, waterproof bond. The drying time allows the sealant to set properly, making certain no leaks or water damage. Rushing this curing process can weaken the seal and cause costly repairs later.
To make certain your sink edges stay sealed, keep these tips in mind:
- Avoid touching or disturbing the sealant during drying time.
- Keep the area well-ventilated to speed up the curing process.
- Resist using the sink until the sealant is fully cured.
Test for Leaks and Check Water Flow
When should you check for leaks and confirm proper water flow? Right after the drying time is complete, turn on both hot and cold water taps fully. Watch closely under the sink for any signs of dripping or moisture around the plumbing connections. This step is essential for plumbing maintenance, preventing future water damage and costly repairs.
Next, let the water run for a minute to verify consistent flow and drainage without any unusual noises or slow drainage, which could indicate clogs or installation errors. Inspect the faucet for smooth operation and check the sink basin for any water pooling that might affect sink aesthetics.
If you spot leaks, tighten fittings gently or reapply plumber’s tape as needed. Catching issues now saves you from bigger headaches later and guarantees your new kitchen sink functions flawlessly. Testing thoroughly ensures your installation meets both practical and visual standards before you move on.
Clean Up and Finish Your Kitchen Sink Installation
Once you’ve confirmed there are no leaks and everything flows smoothly, it’s time to clean up the workspace and complete your kitchen sink installation. Proper cleaning techniques will guarantee your new sink looks spotless and functions flawlessly. Start by wiping down all surfaces with a mild cleaner to remove dust, adhesive residue, and fingerprints. Then, polish the faucet and drain to bring out their shine.
Don’t skip the finishing touches, they make a big difference. Secure any loose screws and reattach any panels or trim you removed. Finally, organize your tools and dispose of any debris to leave your kitchen neat.
Remember these steps for a satisfying finish:
- Thoroughly clean surfaces for a fresh, professional look
- Tighten and secure all fittings for safety and durability
- Clear the area to enjoy your upgraded kitchen without clutter
Following these cleaning techniques and finishing touches will leave your kitchen sink installation looking and feeling perfect.
Frequently Asked Questions
What Types of Kitchen Sinks Are Best for Small Spaces?
For small spaces, you’ll want to focus on compact sink size considerations, like single-bowl or corner sinks that maximize your countertop options. Undermount sinks save space and create a sleek look, while drop-in sinks are easier to install if you’re on a budget.
Slim, shallow models also free up storage underneath. Choosing the right sink size and style helps you keep your kitchen functional without crowding your limited countertop space.
How Do I Choose the Right Faucet Style for My Sink?
You don’t need a knight’s sword to choose the right faucet style. Focus on faucet compatibility with your sink’s design. Make sure the number of holes and mounting type match.
Next, consider water flow options like single-handle for convenience or dual-handle for style. Think about your daily tasks and kitchen vibe to pick a faucet that’s both functional and visually pleasing.
You’ll end up with a faucet that suits your sink and lifestyle perfectly.
Can I Install a Kitchen Sink Without Professional Plumbing Experience?
Yes, you can install a kitchen sink without professional plumbing experience if you’re comfortable with DIY plumbing. Just make sure you research thoroughly, gather the right tools, and follow step-by-step guides carefully.
Pay close attention to sealing connections and turning off the water supply before starting your sink installation. If at any point it feels overwhelming, don’t hesitate to call a pro to avoid costly mistakes or leaks.
What Maintenance Tips Keep My Kitchen Sink in Good Condition?
Like a well-tuned instrument, your kitchen sink thrives with regular care. You should establish cleaning routines by wiping down surfaces and clearing debris to prevent clogs.
Don’t forget leak prevention. Check under the sink for drips and tighten connections as needed. Using mild cleaners keeps your sink shiny without damage.
Are There Eco-Friendly Options for Kitchen Sink Materials?
Yes, you can definitely choose eco-friendly materials for your kitchen sink. Look for sustainable options like recycled stainless steel, bamboo composite, or natural stone.
These materials reduce environmental impact and often last longer, saving resources over time. Plus, sinks made from recycled or renewable materials help lower your carbon footprint.
When picking your sink, consider these eco-friendly materials to create a greener, more sustainable kitchen space.
Conclusion
Congrats, you’ve just wrestled with pipes, wrestled with water, and emerged victorious. Your new kitchen sink is gleaming like a trophy on your countertop.
No more mysterious drips or rogue floods turning your kitchen into a swimming pool. You’re basically a plumbing superhero now, cape optional.
So go ahead, admire your handiwork, and maybe brag a little. After all, not everyone can turn a sink installation into a DIY masterpiece without calling for backup.
Installing a kitchen sink might seem tough, but now you’ve shown it’s totally doable. Your new kitchen sink is proof that with a little effort, you can handle plumbing like a pro.