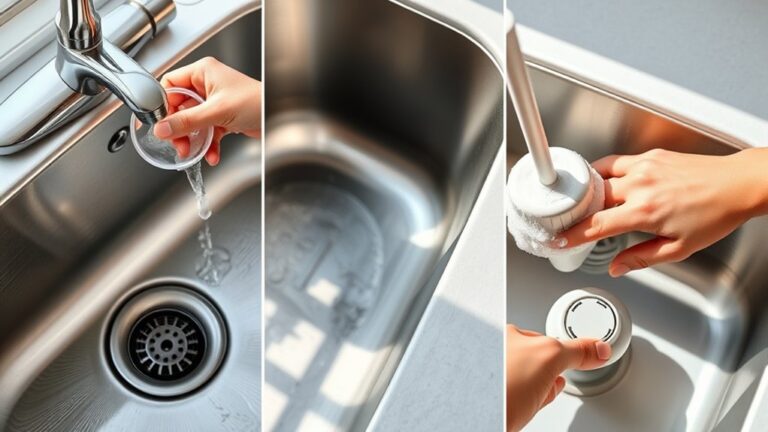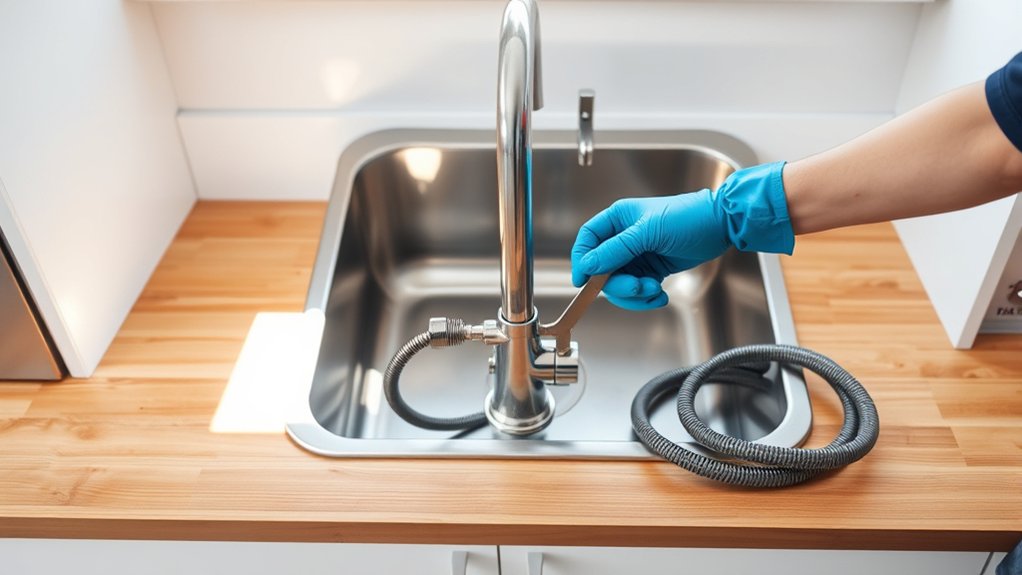
How to Replace Kitchen Sink in 10 Easy Steps
Replacing a kitchen sink can feel overwhelming, and you’re not alone if you’ve struggled with this task before. Many people want a fresh, functional kitchen but worry about the hassle of removing and installing a sink.
The good news is that with the right guidance and tools, you can tackle this project yourself and enjoy a beautiful upgrade.
To replace your kitchen sink in 10 easy steps, first gather your tools and pick the right sink size and style. Turn off the water supply, clear the area, then disconnect plumbing and remove the old sink carefully.
Clean and inspect the cabinet, install your new sink and faucet, then reconnect plumbing securely. Finally, test for leaks and proper drainage, maintaining your sink for lasting use.
Keep going to uncover helpful tips for a smooth installation.
Key Takeaways
- Turn off the water supply and clear the area. Then disconnect the plumbing and remove the old sink carefully.
- Measure your space and select a new sink that fits well. Make sure it matches the right size, style, and mounting type.
- Clean the countertop, position the new sink, and apply sealant. Secure it firmly to ensure a watertight fit.
- Reconnect the water supply lines and install the drain assembly. Tighten connections, but don’t overtighten to avoid leaks.
- Test for leaks by running water and check the faucet operation. Performing regular maintenance will help prolong your sink’s lifespan.
Gather the Tools and Materials You’ll Need

Before you begin replacing your kitchen sink, make sure you have all the necessary tools and materials on hand. Having everything ready saves time and prevents frustration during the project. You’ll need a new sink, plumber’s putty, a wrench, a screwdriver, plumber’s tape, and a bucket to catch water. Don’t forget gloves and a utility knife for safety and precision.
While gathering supplies, consider your decorating ideas. Choose a sink style and finish that complements your kitchen’s look. This step guarantees your new sink improves both function and aesthetics.
Also, think about cleaning tips to maintain your sink once installed. Selecting materials that are easy to clean, like stainless steel or composite granite, will save effort later. Preparing with the right tools and thoughtful choices sets you up for a smooth replacement process and a kitchen you’ll love.
Turn Off the Kitchen Sink Water Supply and Prepare the Area

Once you have your tools and materials ready, the next step is to turn off the water supply to your kitchen sink. Locate the shutoff valves beneath the sink and turn them clockwise to stop the flow. If your valves are old or stuck, consider using eco friendly materials like silicone lubricant to ease the process without harming the environment.
Turn off your kitchen sink water supply by locating and gently turning the shutoff valves clockwise, using eco-friendly lubricant if needed.
After shutting off the water, open the faucet to drain any remaining water in the pipes. This helps prevent spills during removal.
Next, clear the area under and around the sink to give yourself plenty of workspace. Lay down a towel or waterproof mat to catch any drips and protect your cabinets.
Practicing water conservation means avoiding unnecessary water waste, so be ready to catch any residual water in a bucket or container. Taking these careful preparatory steps ensures a smooth, environmentally conscious start to your kitchen sink replacement.
Measure and Pick the Perfect Kitchen Sink

How do you make sure your new kitchen sink fits perfectly and meets your needs? Start by measuring your countertop’s cutout accurately. This step is vital to avoid costly mistakes.
Next, focus on choosing materials that suit your lifestyle. Stainless steel offers durability, while composite granite adds elegance and scratch resistance. Keep these sink installation tips in mind as you shop:
- Measure the length, width, and depth of your current sink to find a compatible replacement.
- Consider the number of sink bowls and their layout to match your kitchen workflow.
- Check the mounting type (top-mount, under-mount) to guarantee it aligns with your countertop.
Disconnect Plumbing and Remove the Old Kitchen Sink
First, make sure to turn off the water supply so you don’t end up with any leaks. Then, carefully detach the plumbing connections—take your time here to avoid causing any damage. Once that’s done, go ahead and remove the sink fasteners, and you’ll be able to lift out the old sink without any trouble.
Turn Off Water Supply
Where do you start when replacing your kitchen sink? First, you need to turn off the water supply. This step is essential to prevent leaks and water damage.
Follow these three simple actions:
- Locate the shutoff valves under the sink or the main water valve for your home.
- Turn off both the hot and cold water valves completely, considering your faucet type, as some require specific handling.
- Open the faucet to drain any remaining water in the lines, ensuring no water spills when you disconnect plumbing later.
Detach Plumbing Connections
Before you remove the old kitchen sink, you’ll need to detach all the plumbing connections carefully. Start by loosening the slip nuts on the drain pipes and disconnecting the water supply lines.
Watch for pipe corrosion because it can make removal tricky. Use penetrating oil if needed. This step is essential for plumbing troubleshooting to guarantee no leaks occur later.
| Step | Action |
|---|---|
| 1 | Loosen slip nuts on drain pipes |
| 2 | Disconnect water supply lines |
| 3 | Inspect for pipe corrosion |
| 4 | Apply penetrating oil if stuck |
| 5 | Remove pipes carefully |
Handle pipes gently to avoid damage. Once detached, you’re ready for the next step in replacing your kitchen sink.
Remove Sink Fasteners
Once you’ve detached the plumbing connections, focus on loosening the sink fasteners that hold the old kitchen sink in place. Removing fasteners can feel tricky, but with the right approach, it’s straightforward. Here’s how to tackle it:
- Locate all the clips or brackets securing the sink under the countertop.
- Use a screwdriver or wrench to carefully loosen clips, making sure not to damage the countertop.
- Once all fasteners are loose, gently lift the sink out, watching for any remaining attachments.
Clean and Inspect the Sink Cabinet and Countertop for Damage
Although you’ve removed the old sink, you’ll need to thoroughly clean and inspect the cabinet and countertop to assure they’re in good condition. Check for water damage, mold, or weakened spots that could affect cabinet durability. Wipe down surfaces to spot any cracks or warping in the countertop material.
Addressing these issues now prevents costly repairs later.
Use this quick table to assess common problems and their impact:
| Issue | Effect on Cabinet/Countertop |
|---|---|
| Water stains | Weakens cabinet wood over time |
| Mold or mildew | Causes health risks, material decay |
| Cracks or chips | Reduces countertop lifespan |
| Loose or damaged joints | Compromises cabinet stability |
| Warping or swelling | Indicates water damage |
Taking care of these steps ensures your new sink rests on a solid, damage-free foundation.
Position the New Kitchen Sink and Seal the Edges Properly
Place the new sink carefully, making sure it lines up perfectly with the countertop cutout. Once you’ve got it in position, go ahead and apply a consistent bead of sealant around the edges to keep leaks at bay. Doing these steps will ensure you get a secure and watertight fit.
Align Sink Correctly
Before securing your new kitchen sink, you’ll want to carefully align it to guarantee a perfect fit within the countertop cutout. Aligning fixtures properly ensures your sink sits flush and looks professional. Follow these steps to get it right:
- Place the sink gently into the cutout, checking that all edges line up evenly with the countertop.
- Adjust angles as needed by slightly shifting the sink to avoid gaps or unevenness.
- Double-check that the sink doesn’t rock or tilt. Press down firmly to confirm stability.
Taking these steps helps prevent leaks and ensures your sink looks great. Properly aligning your sink now saves you from frustrating adjustments later. Stay patient and precise to enjoy a flawless installation.
Apply Sealant Evenly
Once your sink sits perfectly aligned and stable, you can start applying sealant to secure it in place. Begin by loading your caulking gun with a kitchen-safe sealant, then apply a continuous bead around the sink’s edge where it meets the countertop.
Focus on sealant application that guarantees even coverage; this prevents water from seeping underneath the sink. Use steady pressure and move smoothly along the edge to avoid gaps or clumps.
After applying, smooth the sealant with a wet finger or a sealant tool for a clean, professional finish. Make sure every part of the edge is covered evenly, sealing all potential entry points.
Proper sealant application not only locks the sink firmly but also protects your countertop from moisture damage.
Install the Faucet and Accessories on Your New Kitchen Sink
Although installing the faucet and accessories might seem tricky, you can handle it yourself with the right tools and a clear plan. Start by checking the accessory compatibility to guarantee everything fits your new sink. Proper faucet installation sets the foundation for a functional kitchen.
Installing your faucet is manageable with the right tools and a clear plan—start by ensuring compatibility for a smooth fit.
Follow these steps:
- Insert the faucet through the designated hole(s) and secure it underneath with mounting nuts.
- Attach any additional accessories like soap dispensers or sprayers, making sure they align with your sink’s pre-drilled holes.
- Tighten all connections firmly but avoid overtightening to prevent damage.
Take your time with each step, and double-check that all parts sit flush to avoid leaks later. With patience and precision, you’ll enjoy a perfectly installed faucet and accessories that look great and work smoothly. This part might feel detailed, but nailing it now will save you headaches down the line.
Reconnect the Plumbing and Check for Leaks
Alright, now go ahead and reconnect the water supply lines. Be sure to secure all the drain connections tightly. It’s important that everything is properly aligned so you don’t run into any problems later on.
Once you’ve got everything hooked up, turn the water back on and keep an eye out for any leaks. Check carefully to make sure everything’s sealed up nice and tight.
Attach Water Supply Lines
Before you reconnect the water supply lines, make sure the shutoff valves beneath the sink are fully closed to prevent any unexpected leaks. Now, attach the lines securely to the faucet and valves, ensuring tight connections. Using eco-friendly fixtures promotes water conservation, so consider upgrading if you haven’t already.
Follow these steps:
- Hand-tighten the connections first, then use a wrench to snug them. Don’t overtighten to avoid damaging threads.
- Slowly open the shutoff valves to restore water flow and watch for leaks.
- Check every joint carefully; even a small drip wastes water and can cause damage over time.
Secure Drain Connections
After attaching the water supply lines and confirming there are no leaks, you’ll want to reconnect the drain plumbing to complete your sink installation. Begin by aligning the drain pipe installation with the sink’s drain outlet and the P-trap.
Apply a generous amount of sealant around the sink drain flange to guarantee a watertight seal. Then, secure the drain pipe tightly, making sure all washers and gaskets are properly seated to prevent leaks.
Hand-tighten the slip nuts, then give them a snug turn with a wrench. Avoid overtightening to prevent damage. Finally, check each connection visually to confirm everything’s aligned well.
This careful securing of drain connections ensures a solid, leak-free plumbing setup before moving on to thorough leak testing.
Test For Water Leaks
How can you be sure your kitchen sink installation is leak-free? After reconnecting the plumbing, it’s crucial to test for leaks by carefully checking every joint and connection. Follow these steps:
- Turn on the water supply slowly, monitoring the water pressure to avoid stressing new pipe materials.
- Inspect each connection closely. Look for any drips, moisture, or dampness around the pipes and fittings.
- Run both hot and cold water for several minutes, as temperature changes can reveal hidden leaks.
Pay close attention to the type of pipe materials you used, as some may require extra tightening or sealant. Catching leaks early prevents water damage and costly repairs, so don’t rush this step. You’ll feel confident your sink is installed right when everything stays dry.
Test Your New Kitchen Sink for Proper Function
Once you’ve connected all the plumbing, you’ll want to turn on the water and check for leaks or drainage issues. Pay special attention around seals and joints, as different sink material types like stainless steel or composite granite may require a careful fit. Use your installation tools to tighten any loose connections without overdoing it, which could damage the sink or pipes.
Next, run both hot and cold water to ensure the faucet functions properly. Test the drain by filling the sink and then releasing the stopper; water should flow freely without pooling. Don’t forget to check for any unusual noises or slow drainage, which might indicate a clog or improper alignment.
Maintain Your Kitchen Sink for Long-Term Use
Verifying your sink works perfectly is just the beginning of keeping it in great shape. To guarantee your kitchen sink lasts, you need to maintain both its functionality and appearance. Focus on these three key steps:
Ensuring your sink functions well is just the start of lasting maintenance and care.
- Clean and protect decorative finishes regularly with mild soaps and soft cloths. Avoid harsh chemicals that can dull or damage the finish, keeping your sink looking new.
- Perform routine faucet maintenance by checking for leaks, tightening loose parts, and replacing worn-out washers. This prevents water waste and extends faucet life.
- Clear drains and avoid clogs by disposing of food scraps properly and using strainers. This prevents buildup that can cause backups or damage.
Frequently Asked Questions
What Types of Kitchen Sinks Are Best for Small Spaces?
For small spaces, you’ll want a compact kitchen sink that maximizes your area without sacrificing function. Look for sinks with excellent countertop compatibility, like undermount or drop-in models that fit seamlessly with your counter.
Material durability matters too. Stainless steel or composite granite resist scratches and stains while lasting long. These materials keep your small kitchen efficient and stylish, letting you make the most of limited space without worrying about wear and tear.
Can I Install a Kitchen Sink Without Professional Plumbing Skills?
Think of DIY plumbing like planting a tree. You start with small roots, and with patience, it grows strong. Yes, you can install a kitchen sink without professional plumbing skills if you follow clear instructions and use the right tools.
Sink installation requires careful measurements, sealing, and connecting pipes properly. With attention to detail and some basic knowledge, you’ll save money and gain confidence tackling this rewarding project yourself.
How Do I Dispose of My Old Kitchen Sink Responsibly?
You can handle sink disposal responsibly by checking local recycling options first. Many metal sinks can be taken to scrap yards or recycling centers, where they’ll be processed properly.
If your sink is made of porcelain or composite materials, contact your waste management service to see if they accept those items or offer special drop-off days. Don’t just toss it in the trash. Recycling options help reduce waste and protect the environment.
What Are Common Signs That My Kitchen Sink Needs Replacing?
You’ll know your kitchen sink needs replacing when you notice persistent leaks, rust spots, or cracks that DIY plumbing fixes can’t handle. Frequent clogs and slow drainage, despite regular sink maintenance, also signal it’s time for a change.
If your sink’s surface is stained beyond cleaning or the basin’s warped, it’s better to replace than repair. Paying attention to these signs saves you hassle and keeps your kitchen functional.
Are There Eco-Friendly Materials for Kitchen Sinks?
Yes, you can choose eco materials for your kitchen sink that are both durable and sustainable. Options like recycled stainless steel, bamboo composite, and natural stone are popular sustainable options.
These materials reduce environmental impact while offering stylish, long-lasting sinks. When picking your sink, look for certified eco-friendly brands to guarantee you’re making a green choice.
You’ll enjoy a sink that’s good for your home and the planet.
Conclusion
Now that you’ve installed your new kitchen sink, imagine the gleaming basin catching sunlight as water flows smoothly without a drip. With your tools tucked away and plumbing secure, your kitchen feels refreshed and ready for busy days ahead.
By following these steps, you’ve not only replaced a sink but also added a touch of ease and style to your space. Keep your kitchen sink maintained, and enjoy every splash for years to come.