How to Stain Kitchen Cabinets in 5 Easy Steps
If you’ve ever tried to refresh your kitchen cabinets but felt overwhelmed by the process, you’re not alone. Many people struggle to find an easy, step-by-step way to stain cabinets without making a big mess or wasting time. The good news is, staining your kitchen cabinets can be straightforward and rewarding with the right approach.
To stain your kitchen cabinets in five easy steps, start by choosing a stain that matches your kitchen’s color and wood grain. Gather supplies like stain, sandpaper, brushes, gloves, and clean rags. Remove cabinet doors, clean, then sand surfaces smooth.
Apply the stain evenly with a cloth or brush, wiping off excess, then seal with polyurethane once dry. Finally, reattach hardware and maintain the finish by cleaning gently. Keep going to uncover tips for a flawless, durable result.
Key Takeaways
- Remove cabinet doors, clean thoroughly, and sand surfaces to prepare for staining.
- Choose a stain that complements your kitchen palette and test it on scrap wood first.
- Apply stain evenly with a lint-free cloth or brush, working along the wood grain.
- Wipe off excess stain promptly and allow it to dry in a dust-free, ventilated area.
- Seal stained cabinets with clear polyurethane, let dry, then reassemble and maintain regularly.
Choose the Right Stain for Kitchen Cabinets

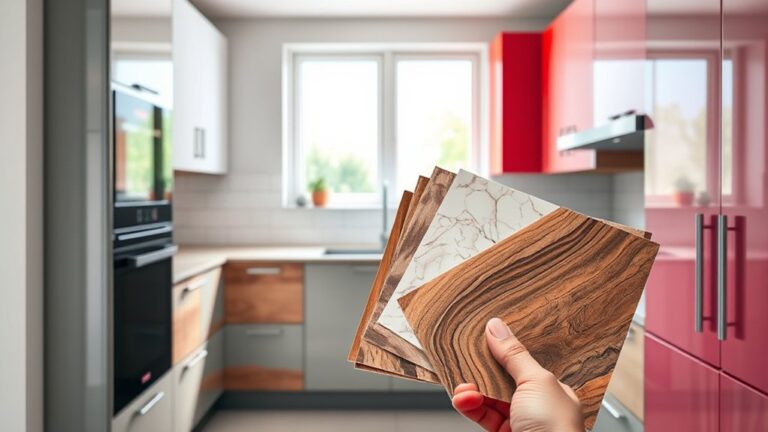
How do you pick the perfect stain for your kitchen cabinets? Start by considering color matching carefully. The stain should complement your kitchen’s overall palette, including your countertops, backsplash, and flooring. Look at samples in different lighting, natural and artificial, to see how the color shifts throughout the day.
Next, understand the various stain types available. Oil-based stains penetrate deeper, offering rich, long-lasting color. Water-based stains dry faster and have lower odor, perfect if you want a quicker project. Gel stains are thicker and great for vertical surfaces because they don’t drip.
Each type affects the wood grain differently, so choose based on the finish you want. Remember, your goal is to enhance your cabinets’ natural beauty while ensuring the stain aligns with your kitchen’s style. Taking these steps will make your cabinets look stunning and cohesive once stained.
Gather Essential Supplies for Staining

Before you start staining, make sure you have all the essential supplies on hand to keep the process smooth and efficient. Having the right tools helps you focus on color matching and prevents mistakes that require stain removal.
Here’s a quick rundown of what you’ll need:
| Supply | Purpose | Tip |
|---|---|---|
| Wood stain | Adds color | Test on scrap wood first |
| Sandpaper | Prepares surface | Use fine grit for smooth finish |
| Brushes/rags | Applies stain | Use lint-free cloths |
| Gloves | Protects hands | Disposable nitrile preferred |
Gathering these supplies before you begin saves time and avoids interruptions. Keep extra rags handy for quick stain removal if you spill or need to fix uneven color matching. With everything ready, you’re set to move on to preparing your cabinets without hassle.
Prepare Kitchen Cabinets for Staining

Once you’ve gathered your supplies, the next step is to get your kitchen cabinets ready for staining. Start by removing all cabinet doors, drawers, and hardware. This makes the process easier and prevents stain from getting on hinges or handles.
Next, focus on thorough cabinet cleaning. Use a degreaser or a mixture of warm water and mild detergent to remove grease, dirt, and grime. Rinse well and let everything dry completely.
After cleaning, it’s time for surface sanding. Sand all cabinet surfaces with medium-grit sandpaper to strip the old finish and create a smooth base for the stain to adhere to. Pay special attention to any rough spots or imperfections.
Once the medium grit is done, finish with fine-grit sandpaper for a polished surface. Wipe away dust with a tack cloth to make sure no particles interfere with staining. Proper cleaning and sanding are vital for achieving a smooth, even stain finish.
Apply Stain Evenly and Seal Your Cabinets
Although staining kitchen cabinets can seem intimidating, applying the stain evenly is key to achieving a professional look. Start by using a clean, lint-free cloth or a high-quality brush to spread the stain in the direction of the wood grain. This helps maintain color consistency and prevents blotchy patches.
Applying stain evenly with a clean cloth or brush along the wood grain ensures a smooth, professional finish.
Work in manageable sections, wiping off excess stain promptly to avoid uneven spots. Make certain the stain drying process occurs in a dust-free, well-ventilated area to ensure a smooth finish.
Once the stain is fully dry, apply a clear sealant or polyurethane to protect the wood and lock in the color. Use a brush or spray for an even coat, allowing adequate drying time between layers according to the product instructions.
Sealing your cabinets properly not only preserves the beautiful color but also shields them from moisture and daily wear. This will ensure your kitchen looks fresh and polished for years.
Reassemble and Maintain Your Stained Cabinets
After sealing your cabinets, you can start putting everything back together. Begin by reattaching the cabinet doors and drawers carefully, making sure they align properly. Next, install the cabinet hardware like knobs and handles. These finishing touches will bring your cabinets to life and complement their new look.
Take your time tightening screws to avoid damaging the wood or stain. Once everything’s reassembled, maintain your stained cabinets by wiping them regularly with a damp, soft cloth to remove dust and spills. Avoid harsh chemicals or abrasive cleaners that can strip the finish.
If you notice any wear over time, apply a fresh coat of sealant to protect the wood and preserve the stain’s vibrancy. By performing these simple maintenance steps, your kitchen cabinets will stay beautiful and durable for years to come. Keeping up with care ensures your hard work continues to shine, making your kitchen a welcoming, polished space.
Frequently Asked Questions
Can I Stain Kitchen Cabinets Over Paint?
Yes, you can stain kitchen cabinets over paint, but you’ll need to prep the surface well. Make sure to sand the paint thoroughly to remove any gloss and create a smooth base for staining.
Use staining tools like brushes or rags for even application. Color matching is essential if you want a consistent look, so test your stain on a small area first.
Proper prep ensures your cabinets look great and last longer.
How Long Does Stained Cabinets Typically Last?
You might think stained cabinets last as long as your favorite pair of jeans, worn but reliable. In reality, cabinet durability depends on the stain quality and how well you maintain them.
Typically, stained cabinets can last 10-15 years, showing off rich stain color options that keep your kitchen vibrant. Choose a durable finish, and you’ll enjoy that warm, natural look far longer than you’d expect, defying time and wear.
Are There Eco-Friendly Stains Available for Cabinets?
Yes, you can definitely find eco friendly options for staining your cabinets. Many companies now offer natural stain techniques using plant-based or low-VOC ingredients that reduce harmful emissions.
These stains not only protect your cabinets but also minimize environmental impact, making your kitchen healthier. When choosing, look for certifications like Green Seal or GREENGUARD to guarantee the product truly meets eco friendly standards. You’ll get beautiful results without compromising sustainability.
Can I Stain Cabinets Made of Laminate?
You might think staining laminate cabinets is as impossible as painting the sky! But yes, you can stain them with proper laminate preparation. Start by cleaning thoroughly and sanding lightly to help the stain stick.
Since laminate is tricky, choose eco-friendly options like water-based stains for better adhesion and safety. Remember, patience and the right prep turn laminate into a stunning, refreshed surface without harsh chemicals.
How Do I Remove Stain Mistakes or Blotches?
To fix stain mistakes or blotches, start with color correction by gently sanding the affected area to even out the stain. Use fine-grit sandpaper to avoid damaging the wood.
For blotch removal, apply a wood conditioner before restaining to help absorb the stain evenly. If blotches persist, a diluted bleach solution can lighten uneven spots.
Always test in a hidden spot first to make sure the best results.
Conclusion
Now that you’ve learned the secrets to staining your kitchen cabinets, you might be wondering, can you really transform your space with just five simple steps? The answer is yes.
With the right stain, careful preparation, and a steady hand, your cabinets will go from tired to timeless. But don’t rush it; each step builds on the last.
Ready to see your kitchen’s true potential? The magic of staining kitchen cabinets is in your hands.