How to Build a Kitchen Island in 5 Simple Steps
If you’ve ever dreamed of adding a kitchen island but felt overwhelmed by the process, you’re not alone. Many people struggle with where to start or worry about making costly mistakes. A kitchen island can transform your space, offering extra prep area, storage, and style—but building one might seem complicated.
To build a kitchen island in five simple steps, start by measuring your space and choosing a style that fits your needs, like cooking or storage.
Next, gather durable materials and tools, including wood, screws, and a drill.
Then, construct the frame and secure a flat base.
Add storage options, attach your chosen countertop, and finish with paint and hardware that match your kitchen’s vibe.
Keep going to uncover helpful tips for a flawless island build.
Key Takeaways
- Measure your kitchen space and decide on the island’s size, style, and primary function.
- Gather all materials and tools, including wood, countertop, screws, and power tools.
- Build a sturdy frame and base, making sure all parts are level and securely fastened.
- Install storage options and securely attach the chosen countertop to the frame.
- Finish by painting or staining and adding hardware that complements your kitchen design.
Plan Your Kitchen Island Size and Style

Before you begin building, you need to plan your kitchen island’s size and style carefully. Start by measuring your kitchen space to guarantee the island fits comfortably without disrupting traffic flow. Think about how you’ll use the island, whether for cooking, dining, or extra storage, as this will influence its dimensions and features.
Look for design inspiration online or in magazines to find styles that match your kitchen’s vibe. Consider the overall look you want: modern, rustic, or minimalist.
Next, weigh your material options. Wood offers warmth and versatility, while stainless steel gives a sleek, industrial feel. Quartz or granite countertops add durability and elegance.
Choose materials that complement your kitchen’s existing finishes and suit your lifestyle. By planning size, style, and materials thoughtfully, you’ll create a kitchen island that’s both functional and visually appealing, setting a solid foundation before you start building.
Get Your Kitchen Island Materials and Tools Ready

Once you’ve settled on your kitchen island’s size, style, and materials, it’s time to gather everything you’ll need to bring your design to life. Material selection is essential. Choose durable wood or plywood for the frame and a countertop material that fits your style and budget.
Don’t forget screws, brackets, and paint or stain to finish the look. Your tool list should include essentials for cutting, assembling, and finishing your island.
Here’s a quick reference table for your material selection and tool list:
| Material Selection | Tool List |
|---|---|
| Plywood or hardwood | Circular saw |
| Countertop (granite, wood, or laminate) | Drill with bits |
| Screws and brackets | Screwdriver |
| Paint or stain | Measuring tape |
Having these ready will keep your build smooth and efficient, setting you up for success in the next steps.
Build the Kitchen Island Frame and Base
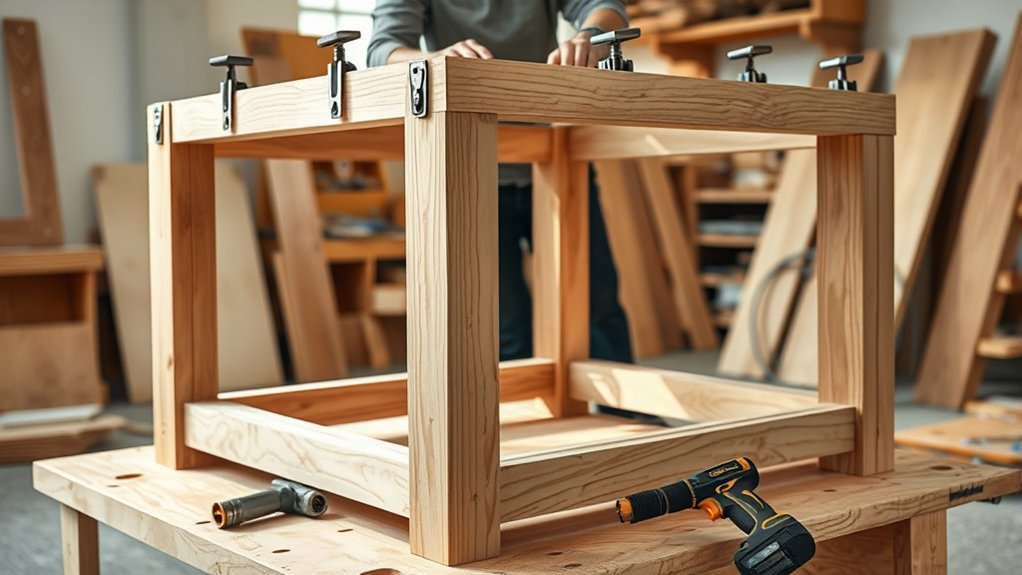
As you begin building the kitchen island frame and base, focus on creating a sturdy, level foundation that will support the entire structure. Start by measuring and cutting your lumber precisely, then assemble the frame using screws or nails to guarantee stability. Check with a level frequently to keep everything even.
Build a sturdy, level kitchen island frame by measuring precisely and securing with screws or nails for lasting stability.
Reinforce corners with brackets for added strength. Once the frame is secure, attach the base, making sure it sits flat on the floor to prevent wobbling.
Consider how you’ll incorporate decorative accents to improve the island’s look without compromising durability. Simple moldings or trim can add charm and personality.
Keep maintenance tips in mind by selecting materials that withstand kitchen wear and tear, and design the base for easy cleaning access. A solid, well-built frame ensures your kitchen island will remain functional and attractive for years to come.
Install Kitchen Island Storage and Countertop
How will you maximize both functionality and style when installing your kitchen island’s storage and countertop? Start by selecting storage solutions that fit your needs, like drawers, shelves, or cabinets to keep essentials within easy reach. Securely attach the countertop, making sure it’s level and firmly anchored to the base for durability. Choose a countertop material that complements your kitchen’s design while withstanding daily use.
Next, consider adding decorative accents like stylish handles or open shelving to elevate the island’s look without sacrificing function. Incorporate lighting options such as under-cabinet LEDs or pendant lights above the island to brighten the workspace and add ambiance. These lighting choices not only improve visibility but also highlight your decorative accents, enhancing the island’s overall appeal.
Finish Your Kitchen Island With Paint and Hardware
Although your kitchen island already has a solid foundation, finishing it with the right paint and hardware will truly bring your design together. Start by choosing decorative finishes that complement your kitchen’s style. Whether you prefer a matte, glossy, or textured look, the paint should *improve* the island’s visual appeal and durability.
Don’t forget to prep the surface properly before painting to *guarantee* a smooth, lasting finish.
Next, focus on hardware selection. Pick handles, knobs, or pulls that match both the decorative finishes and your kitchen’s overall aesthetic. Hardware isn’t just functional; it adds character and can make your island stand out.
Opt for quality materials like brushed nickel, brass, or matte black for durability and style. By carefully selecting paint and hardware, you’ll create a kitchen island that’s not only practical but also a striking centerpiece in your space.
Frequently Asked Questions
Can I Add Electrical Outlets to My Kitchen Island?
Yes, you can add electrical outlets to your kitchen island. When doing so, you’ll need to plan the electrical wiring carefully to meet safety codes.
Consider outlet placement for convenience, like near prep areas or seating spots. It’s best to hire a licensed electrician to handle the wiring and make sure everything’s up to code. This way, you’ll have functional outlets without compromising safety or design.
What Are the Best Lighting Options for Kitchen Islands?
The best lighting options for your kitchen island combine ambient lighting with task illumination. Pendant lights are popular because they add style and focus light right where you need it for cooking or prep work.
You can also use recessed lights for even ambient lighting that brightens the whole area. Consider dimmable fixtures so you can adjust the mood and functionality easily, making your kitchen island both practical and inviting.
How Do I Secure My Kitchen Island to the Floor?
Think of securing your kitchen island like planting a tree. It needs a solid root to stand tall.
To anchor your island, first choose materials that can handle screws or brackets, like wood or MDF. Use installation techniques such as attaching metal brackets to floor joists or drilling anchor bolts into concrete floors.
This guarantees your island stays stable and safe, just like a tree firmly rooted in the ground during a storm.
Can a Kitchen Island Be Mobile or on Wheels?
Yes, a kitchen island can be mobile or on wheels, offering great flexibility. You’ll want to examine mobility options that suit your kitchen layout and weight requirements.
Wheel installation is key. Choose heavy-duty casters with locks to keep the island stable when needed. This way, you can easily move the island for cleaning or rearranging, then secure it in place during use.
It’s a smart solution if you need versatility in your kitchen space.
What Are Common Design Mistakes to Avoid With Kitchen Islands?
You’ll want to avoid choosing countertop materials that don’t hold up well to kitchen use, like delicate stone without proper sealing. Don’t overlook storage solutions. Failing to include enough drawers or cabinets can waste valuable space.
Also, avoid making the island too large for your kitchen’s flow because it can block movement. Keep these in mind to create a functional, stylish island that fits your space perfectly.
Conclusion
Now that you’ve built your kitchen island, get ready to be the envy of every chef and guest! Your kitchen will transform into a five-star culinary arena where meals practically cook themselves.
Imagine gatherings buzzing around your stunning island, filled with laughter and endless snacks. With just five simple steps, you’ve created more than furniture—you’ve crafted the heart of your home, where magic and memories happen every day.
You’re unstoppable! Building a kitchen island has truly changed your space and brought everyone together.